Grow an Orange Tree
Perhaps other than going to the beach every day, the biggest dream of moving to Florida is one where you pick fresh citrus from your backyard juice.
But there’s a lot more that goes into successfully raising an orange tree than just buying one at your local garden center.
Bob Rouse, a horticultural citrus specialist for the University of Florida’s research center in Immokalee, gives us a few tips.
1. Find a nice spot with sandy soil. Stay away from the hard-packed dirt and rock mixture that is often used as the building foundation for homes in our area.
2. Dig a hole bigger than the pot. You want the root ball to fit in easily.
3. Fill the hole halfway with water before placing the tree in.
4. Shake free much of the soil attached to the root ball. You want the roots to be touching the sandy native soil.
5. Using your hand or the handle of your shovel, pack soil tightly around the roots as you fill the hole to avoid air pockets that will stunt your tree’s growth.
6. Water the tree three times a week for the first six weeks and then weekly after. Trees need more water than lawn irrigation.
7. Fertilize the tree after about six weeks.
—Jonathan Foerster
Saber a Bottle of Champagne
Sabrage, or opening champagne with a sword. The tradition dates back to the Napoleonic age.
Lamar Cheatham, the sommelier at The Grill at The Ritz-Carlton, Naples, suggests using a chilled (and dried) bottle and says to locate the crease running the length of the bottle—that’s the seam where the two halves of the bottle meet. (Where the seam meets the lip is the bottle’s weakest point.) Loosen and move the cage around the cork to the uppermost lip to help keep the cork and glass neck together. Then head outdoors for safety purposes. Grip your weapon firmly and place its blunt edge on the seam with the bottle in a mostly horizontal (to somewhat upright) position. Run the blade firmly down the seam toward the lip so that it strikes the lip at a right angle, with as much blade surface as possible. Voila! Allow some champagne to flow from the severed neck to help clear any potential shards of glass, then pour away, being sure to inspect the first few glasses for any errant shards.
—Michael Korb
Properly Eat a Stone Crab Claw
Prepare for a bit of a mess, says John Vorndran, VP of purchasing at Pinchers Crab Shack, but remember how much more fun it is when you need a hammer for dinner.
1. Choose claws with shells that are not extremely dry, and check for any off-odor. Always keep them packed in ice, even when in a refrigerator. If you are holding them for more than a day, drain the water from any melting. Do not leave claws soaking in water for any length of time.
2. Eat the claws cold; because they are cooked immediately off the boat, reheating dramatically dries out the meat.
3. Imagine the three-sectioned claw as your own arm with a tiny upper arm and forearm and a huge hand. Place the claw in your non-dominant hand with the underside facing up. Using a mallet or the handle of an oyster shucker or butter knife (covering the blade with a towel), hit the center of each section. Hit too softly and the shell will not break or will crack only slightly; hit too hard and the meat will shred with the shell, leaving you to pick bits of meat from the shell fragments. The perfect hit will break the shell in four or five good cracks that enable the shell to peel right off the meat. Have plenty of napkins handy.
4. Just use your two bare hands; the large claw section will have half of the claw intact, with the meat connected to it with a tendon inside. “It’s like a lollipop fresh from the Gulf of Mexico,” Vorndran says. The only times you may need a cocktail fork to eat the meat is if the shell was fragmented or the meat sticks to it because of cooling water temperatures.
5. The sweet meat needs no seasoning but goes great with a shot of freshsqueezed lemon juice or a mild sour cream-based Dijon mustard sauce.
—Cayla Stanley
Perfectly Prepare Grouper
GRILLED
“In my opinion, the Gulf of Mexico offers the best grouper,” Chef Fabrizio Aielli, owner of Sea Salt and Barbatella, says. When purchasing grouper, ask for its provenance, and ask if the grouper arrived at the market whole or filleted. Avoid the latter—the longer the fish has been filleted, the less flavor it has. Also avoid fillets that have been stored on ice, which further diminishes the flavor of the saltwater fish. The fish should be firm, white and pink on the skin side. For grilling, Aielli favors black grouper or the slightly more delicate scamp grouper.
As soon as you arrive home, remove the fish from its wrapping, place it on a paper towel, cover it with plastic wrap and put it in the refrigerator until ready to grill. Make sure you cook it the same day.
Straight from the refrigerator, uncover the grouper and season it simply with salt, pepper and olive oil. Touch the raw fillet for comparison when later testing to see if it is done cooking.
Make sure your grill—Aielli recommends the flat-surfaced EVO grill—is properly cleaned so the fish won’t stick. Place the fillet directly on the grill over medium heat, then cover it with a stainless steel bowl or dome to retain heat and moisture. After a few minutes, rotate the fish on its same side. Cover it again. After a few more minutes, flip the fish and repeat the process. Aim for light-brown grill marks, as deep grill marks make the fish bitter. Grilling time depends on the thickness of the fillet, but the fish is done when it’s firm to the touch. It is best to remove the fish from the grill slightly underdone, as it will continue to cook. Eat the grouper right away.
Simplicity is best for highlighting a fresh, quality ingredient, Aielli says; he suggests topping the cooked grouper with a mixture of olive oil, lemon segments and chopped fresh oregano.
BLACKENED
Chef John Venuto of Coconut Jack’s Waterfront Grille uses fresh domestic red grouper for blackening, and recommends a smaller cut because it tends to cook flakier, more fork-tender and less “steaky” than a larger piece.
To make your seasoning, combine paprika, onion power, garlic powder, thyme, oregano, salt and pepper—and a pinch, relative to the amount of spice, of all-purpose flour. The flour prevents a charred, salty flavor and acts as more of a browning agent. Rub the fish with a little butter, which helps the seasoning adhere, and dip it in the seasoning-flour mixture.
Drop the fish into a nonstick sauté pan that has been heated to a very high heat (the key to blackening is high heat, Venuto says) with about half an ounce of olive oil, which allows the butter to caramelize without burning. Brown the fish about three minutes per side and finish it in a 450-degree oven for a few more minutes, until the meat is tender and starts to pull apart to the touch. Serve with fresh seasonal vegetables.
FRIED
For the quintessential fried-grouper experience, says Pam Pischner, owner of Grouper & Chips, it has to be a sandwich.
Start with an 8-ounce fillet of red grouper, which Pischner finds less fishy than the more expensive black grouper. Dredge the fillets in corn starch, which holds the batter better than flour. Dip the coated fillet into a wet, tempura-like batter—Grouper & Chips mixes eggs, Old Bay seasoning and their secret texture weapon, Drake’s crispy fry mix.
Carefully drop the fillet into canola oil that has been heated for 30 minutes to 350 degrees. (If you don’t have a deep-fryer, a pot on the stove will do. As with any frying, watch the oil closely.) Fry for roughly 7 minutes, or until the coating remains indented when pushed with your finger.
Transfer the fillet to a piece of parchment paper, to briefly soak up excess oil, and then onto a sandwich bun—Grouper & Chips uses a soft Kaiser roll, which holds together well without too much bread—topped with lettuce, tomato and pickle. Serve hot with a lemon wedge and tartar sauce.
—CS
Tie a Boat Knot
There comes a time in every Floridian’s life when you’re offered a boat ride: a neighbor has a new toy, a co-worker wants to go fishing, a guy named Noah just tells you to “Get in.” But without fail you’re asked to be a part of the action by tying off the boat when you return from sea. It’s going to be OK. In fact, it’s easy. Chances are you’ll just be in charge of one rope, which is only going to be tied to one cleat. Capt. Noah Stewart of Sanibel explains it in four simple steps.
1. Take the line from its location and put it around the base of the cleat furthest from where the line originates. Friction between the base wrap and the cleat is the holding power. Make sure the line angle from cleat to attaching point is less than 90 degrees.
2. Turn the line three-quarters of the way around base. Do not make multiple base wraps.
3. Lift the line over the cleat, crossing the top, and then under the horn. It should start to look like a figure 8.
4. Pull the line back over the top toward the opposite cleat horn, crossing over the line you just wrapped around the cleat horn. Make a small loop in the line and place the loop over the opposite cleat horn. Pull it tight, so that if the boat pulls on the rope the tension tightens down on your knot.
—MK
Care for an Orchid
The variety of orchid will determine its optimal requirements, but these general rules of thumb from Maryann Thompson, assistant manager and plant purchaser for the Naples location of Driftwood Garden Center, will help guide the way.
Selection: When purchasing an orchid, steer clear of wrinkled or drooping (dehydrated) leaves and wilting or browning flowers, and look for viable buds toward the end of its stalks to give you the greatest longevity of the flowering.
Lighting: Most orchids prefer an indirect light source, like a screened lanai, a non-sunny window, a very bright area within your home, or a spot hanging from or under a tree where the plant will get dappled light throughout the day.
Watering: A good watering once per week is usually sufficient. Water over the top of the leaves, for hydration, and so the water flows down through the medium and then out the bottom of the pot. Most orchids prefer a loose, well-drained medium, such as lava rock, Aliflor clay pellets, sphagnum moss, coconut chips and assorted tree barks—each of which holds moisture a little differently. Supplement with an orchid fertilizer (Thompson recommends Jack’s Classic Special Orchid Special) to keep your plants in optimal condition.
Repotting and pruning: Many orchid species will show numerous roots extending from their pots, but only when the root growth becomes excessive do you need to think of repotting. Sometimes the orchid has grown so large it needs to be split into numerous specimens to be potted individually. Roots can be pruned at this time if necessary. Stems should be pruned after flowering has occurred and the non-bearing stems become brittle. If your orchid is overgrown but flowering, wait until the flowers have faded before starting the repotting process.
—CS
Fish off a Pier
Capt. Connor McNichols, a licensed guide who also staffs the fishing department at the Sunshine Ace Hardware in downtown Naples, says you want to start with the right equipment.
“Most people are using light spinning rods for this kind of fishing,” he says. “And most are jigging.”
You are going to be hitting mainly on pompano and mackerel, so a good rule of thumb is to look for areas where clusters of birds are diving for baitfish. “That’s going to bring in the mackerel and trout, which bring in the pompano.”
The most popular local lure to use is the pink banana jig from Monte. Then you want to get a good cast off the pier. But as the water warms up and the snook start running along the shore, some will switch to live bait, such as shiners, and toss their lines closer to the pilings.
While you don’t need a fishing permit for several of the local piers, you do need to be aware of the rules of each pier. For example, treble hooks are no longer permitted on the Naples Pier as a way to protect pelicans.
—JF
Design a Golf Course
Our area is known for its fun and fair golf courses. But how do you turn 200 acres of scrub brush and wetlands into something that people want to pay $25,000 for the privilege to play on a regular basis? This is the question that drives Tom Fazio, renowned golf course architect who has created nearly a dozen courses in Southwest Florida.
1. The first thing you have to do is figure out what you are actually allowed to change, he says. Since the mid-1980s, wetland preservation laws have made changing the landscape of Southwest Florida much more difficult. “Before that you could just fill up the swamp as a water feature or drain it out,” he says. “Now you have to know all the state and local rules to find the legal criteria for the property you are working on.”
2. Understand the owner’s desires. Fazio has designed locally both stand-alone courses (Old Collier) and those integrated into communities (Mediterra). Getting a feeling for what else the owner has planned for the space makes a big difference. He says one of the best things about working in Southwest Florida before the real estate crash was that competition from multiple developments for the best amenities allowed him to put golf first.
3. Paint with earth and vegetation. Because there isn’t much variety in elevations, Fazio says you need to “contour the land.” Usually the earth removed to make water features becomes the hills for elevated tees or greens. But you need to be careful not to waste the wonderful vegetation that makes Florida landscapes unique.
4. Take into consideration the strongest and weakest players. “Those people who just played (in the U.S. Open), you want them to come say the course is great,” he says. “But they aren’t going to play there often or pay. So it has to be fun for the players with the highest handicaps. That’s the artistic part of designing a course.”
—JF
Clean Lovebugs off Your Car
One of the things the chamber of commerce fails to mention in all of the brochures is the fact that twice a year we are inundated by lovebugs. Like teenagers at prom, these insects are too busy making mix tapes and holding hands (or, you know, whatever) to pay attention to your car barreling down the highway at 70 miles an hour. And sadly, for all involved, their unrequited love leaves a mark. Untreated, lovebug guts can actually etch the surface of your paint and ruin it forever. So you need to be diligent during lovebug season (May and September) and get those buggers off your hood and bumper. If you’re quick, soap and water might do the trick, but savvy mobile detailers such as Tod Liberty of Liberty Automotive Management in Fort Myers suggest dryer sheets to do-it-yourselfers. The chemical makeup releases the gummy, acidic (and dead) bodies of the lovebugs. Your car will be clean and have that fresh-from-the- dryer smell.
—MK
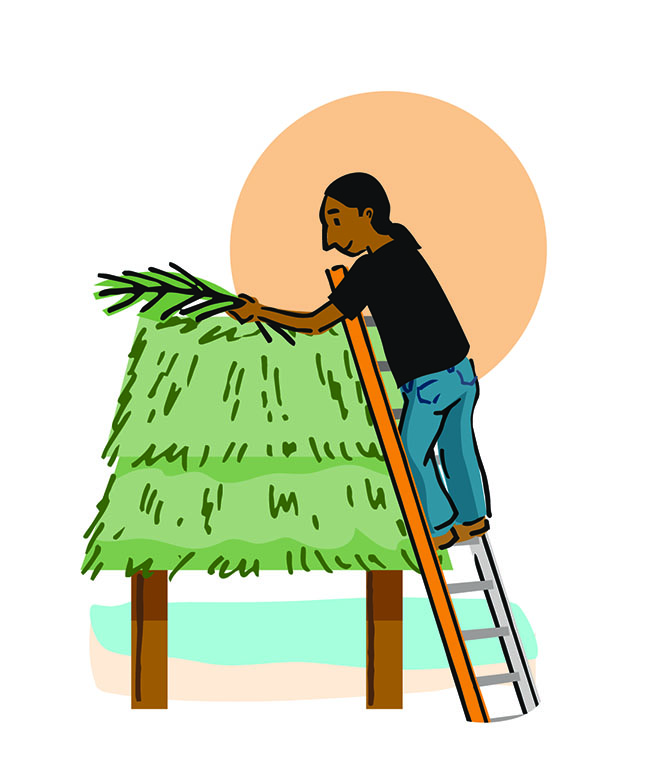
Build a Chickee Hut
While similar structures likely date back several hundred years prior, the traditional Seminole chickee hut as we know it came into being during the Seminole Wars. On the run from soldiers who were chasing them into the Everglades, the tribe needed a way to create simple, but safe, shelters that could be built quickly and left without much notice, says Carrie Dilley, who is writing a book on chickees—Changing Chickees: Finding a Place for Traditional Architecture in Contemporary Seminole Society—scheduled to be published in 2015 by the University Press of Florida.
The beauty is its simplicity (and all-weather capabilities). It’s really just a few different materials. In the 1800s, chickees were built from cypress logs, palmetto fronds and string. Now nails have come in to make them a little sturdier, and often treated pine takes the placeof cypress for longevity.
A typical 12-foot-by-12-foot hut requires somewhere in the neighborhood of 2,000 fronds for the roof. “Gathering the materials takes longer than the actual building process,” Dilley says.
The fronds are harvested while they are still on the trees, so they are easier to work with, but they are allowed to dry for a couple of days before the thatching starts. Thatch patterns vary from builder to builder, but the most common zigzag pattern is said to be the best at repelling rain. Dilley says the seams should be about 2 inches apart to keep water out but keep the fronds from retaining it as well. One final note: Because the huts are part of Seminole heritage, tribe members are allowed to construct chickees without permits. If you plan to do it yourself or hire a vendor outside the tribe, there will be extra steps to go through.
—JF
Craft the Perfect Key Lime Pie
Knocking out nearly 10-gallon batches of custard filling, Tony Ridgway—chef and co-owner of Tony’s Off Third, Ridgway Bar & Grill and Bayside Seafood Grill & Bar— sells four or five dozen of his Key lime tarts a day during season.
Think traditional with a twist. Three’s a charm with authentic Key lime pie, in the form of egg yolks, sweetened condensed milk and lime juice. There’s nothing esoteric about the ideal ingredients, Ridgway says, and the mixing is simple. So what’s his secret to standout taste? He uses three times the lime juice of a typical recipe, which provides a tart freshness to cut through the rich custard.
Downsize. When it comes to Key lime, Ridgway pushes an individual tart over a pie. He uses a bottomless stainless-steel ring, which gives great conduction for a crisp crust you just can’t get from a pie plate or aluminum pan. It cooks through evenly, and the ring’s straight sides and easy liftoff ensure consistent presentation and prevent that ever-crumbly plate that comes with a slice. If you need a more typical pie aesthetic, buy a larger ring or try a springform pan to keep the straight-edged crust. (There’s no place for a pastry crust with true Key lime, Ridgway says—he uses melted unsalted butter, graham cracker crumbs and granulated sugar. Squeeze the mixture in your hands to test the ratio; if it doesn’t self-form, it needs more butter.)
Cook it through. The baked method helps the crust adhere to the filling, prevents a raw-egg taste and sets the custard with a real-deal, creamy-but-not-runny texture, Ridgway says. He bakes his tarts (atop parchment paper, spaced amply on a baking sheet for even heating) for 18 minutes in a 320-degree convection oven (about 20 minutes at 350-360 degrees in a conventional oven). The lower temperature keeps the custard from rising. You can tell the tart is perfectly done when it passes the “jiggle test” or an inserted toothpick comes out moderately clean. Remove the ring with tongs while the tart is still warm for the cleanest release.
Go fresh. Whipped cream, that is. The slightly sweet homemade topping balances the tart custard and completes Ridgway’s trifecta of taste, texture and presentation. And as soon as the tart is cool enough for the cream, it’s ready to eat. Keep the tart (or pie) refrigerated, for up to 72 hours.
—CS
Test-drive an Aston Martin
Step 1: Check your financials. Ninety-five percent of Aston buyers pay cash.
Step 2: Head to Naples Luxury Imports.
Step 3: Introduce yourself to salesman Jeff Zapp.
Step 4: Fall in love (with a car, not with Zapp).
The truth is that moving to Naples is a turning point in most people’s lives. And, assuming you can afford it, you should celebrate with a sporty little number that lets everyone know you’ve arrived. An Aston Martin is just the ticket. But they’re not normal cars you just hop in and drive. They’re … different. Salesman Jeff Zapp knows them better than almost anyone in Southwest Florida and gave us the lowdown on the numerous models available, including the Vantage, DB9, Rapide S and Vanquish and their various incarnations (ranging in price from approximately $150,000 to $333,000). The first thing you’ll notice is the flush handles on the doors. You merely push one end of them and do the “handle handshake,” which opens the doors at a 12-degree rise (to avoid hitting curbs). Chances are Zapp will take the wheel first to explain all of the features you need to be aware of before you test it out. Once inside, you slip the $2,700 crystal “key” into the middle of the dashboard. If you take a V-8 Vantage, its Sportshift transmission doesn’t require you to put your foot on the brake. Regardless of whether the car is in gear or not, it won’t move until you step on the gas. Speaking of gears, there is no shifter; you push buttons (again, in the middle of the dashboard) for drive, reverse, neutral or sport. Select sport and you will be shifting the car via the shift paddles located just behind the steering wheel. Right paddle upshifts. Left paddle downshifts. Select drive and the car goes like a regular automatic—except it wants to go fast, so it has a tendency to lurch during shifts. That is not the case with the V-12 Vanquish Volante (which we also test drove). That is a silky-smooth beast.
—MK
Open a Coconut
If you’re working with one of the dried varieties you find at the grocery, your best bet is a hammer and some safety goggles. You can then coax out the meat with a flathead screwdriver and some skill. For a green coconut, Hector Ramirez, who sells green coconuts at his fruit and vegetable stand at the Ortiz Flea Market in Fort Myers, uses a machete (and excellent hand/eye coordination) to slice down to the membrane holding the water, then merely pricks through that skin with a straw and drinks in their watery goodness. Ramirez says if you’re not handy with a machete (and with one small slip you won’t be handy with anything), an electric drill with a 3/8-inch bit will do the trick, leaving an opening just the perfect size for a straw.
—MK
Name a Gated Community
Grey oaks. Fiddlesticks. Three Oaks. Moraya Bay. Those names evoke certain thoughts for folks in Southwest Florida, but outside they are just words. It took savvy development and good marketing to turn them into the placeholders for certain lifestyles, levels of affluence and prestige.
In the end, the name of the community you live in likely came down to two things—the developer’s gut feeling and government approval.
“There are certain names that you can’t use anymore,” says Stock Development CEO Brian Stock. “Whether it be for addressing purposes, for streets or communities, certain words are at maximum capacity.”
So after knowing what you can’t use, it’s really just spitballing until you find something that feels right.
Some communities will be easy to name. In Stock’s Lely Resort development, the three golf courses are a big draw, so a lot of the communities have a golfing theme. There’s a sub community called The Majors, where the streets are named after famous golf courses. Another is Masters Reserve, where words associated with the famed golf tournament are used for locations.
“You think about how you are going to amenitize a community and then you pick three, four, five themes and start from there,” Stock says. “But there really is no science to it.”
Stock has found success in all sorts of avenues. The golf-themed, the nature-themed (Black Bear Ridge), foreign languages (Paseo, Ole) and just made-up words.
“‘Vivante’ doesn’t really mean anything,” Stock says. “But our marketing company put together a package with how they were going to sell it—the font, logo, everything—and then they sold me on it.”
Stock says once you hit on the right name it just sort of feels right in your gut and then you know.
“There’s no magic formula,” he says. “A lot of thought goes into it and then it just works.”
—JF
De-stink and Preserve Your Shells
First things first: The best way to find your shells, says José H. Leal, curator at The Bailey-Matthews Shell Museum, is to scour the sandy shores of barrier islands at low tide. And note the live shelling ban in Lee and Collier counties—sea stars, sand dollars and any shells containing living mollusks are off-limits. Once you’re home, here’s what to do.
1. Wash your shells in fresh water to rinse away any sand or salt, which attracts moisture that softens the shell over time.
2. If any shell surfaces require more than rinsing, soak the shells in a 50-50 solution of bleach and water for a few hours. This will help dislodge growths such as seaweed and barnacles and get rid of any typical odor. Be sure to wear gloves when dealing with the bleach.
3. If necessary, scrub off lingering imperfections with a tool such as a hard-bristled toothbrush, cleaning brush or small screwdriver.
4. If you can see within a shell any remains of the dead animal, which will cause further odor, you may be able to remove it using a bent wire, or by freezing the shell and shaking the animal out once it has hardened.
5. Rinse the shells again in fresh water.
6. Using a small brush, apply a very thin layer of mineral oil to the shells to enhance their color (using too much oil will soak and soften the shell).
—CS